Thursday, March 31, 2016


Sixaxis Controller 0.6.6 APK
Requirements: Android 2.2 and up
Size: 184 KB
Rating: 4.3/5
Type: Tools

App Review:

★ User reviews from the Play Store: ★
"Galaxy s4 Works great had no problem installing or using this app thanks :)" --Robert Rowand

"Say goodbye to virtual joysticks! A great app for any dedicated gamer on Android. Everything works flawlessly. Setting up touch profiles takes a little experimenting but once you figure it out, its great. Maybe a future version could include a little tutorial? " --Travis WolfenbergeR

"Works extremely well on galaxy nexus" --Raoul Hira

"Must have app Works perfectly with my galaxy note 2. Makes playing any console emulators well worth it. " --Thomas Burnham

"Works great on HTC evo lte I am happily enjoying all my "touch screen" games on my hdtv via MHL and using ps3 six axis remote easily."  --Ivan Vargas

DESCRIPTION:
*** Please read all instructions carefully. ***
Not all devices are supported, therefore it is strongly recommended that you try the Sixaxis Compatibility Checker (available for free in the Android Market) before purchasing this app.
Finally the wait is over... The ultimate gaming experience awaits! Now you can play games on your phone the way they were meant to be played! Sixaxis Controller allows you to use your Sixaxis and DualShock 3 controllers in many of your favourite games and applications.

*** IMPORTANT ***
- ROOT access is required!!!
- Due to the way pairing is done with the controllers, you need to manually pair your controller with the PC utility SixaxisPairTool (available on the website) and a mini-USB cable. Android 3.1+ users can also pair directly on their devices via USB.
- It is highly recommended that you use an ORIGINAL controller. Many after market controllers will not work with this app. If you get a Client connected: 1 message, but the lights on your controller continue to flash, it is almost certainly not an original Sony controller.
- The fake controllers that are most likely to work (though not guaranteed) are those made by Gasia. If you bought a fake that works but isnt made by Gasia, Id love to hear from you so I can compile a list of known working controllers.
- Be sure to read the instructions in the help menu carefully.

FEATURES:
- Up to four Sixaxis and DualShock 3 controllers supported at once.
- Support as a native gamepad in Android 3.1+ devices. Full support for analog sticks and analog triggers.
- Keyboard emulation. Map all buttons and sticks to almost any key available in Android.
- Mouse emulation. Configure a button to activate the mouse pointer on devices that support mice (most tablets, and many phones should work).
- Touch emulation allows you to map buttons and analog sticks to the screen. Play all your favourite games with full analog support, even those without built-in controller support!
This product is not affiliated with, nor authorized, endorsed or licensed in any way by Sony Corporation, its affiliates or subsidiaries. All trademarks are property of their respective holders.
For assistance, full instructions and FAQ, visit our website at http://www.dancingpixelstudios.com

What’s new in version 0.6.6
Should fix touch emulation on Android 4.3 devices. If youre still experiencing touch emulation issues since upgrading to Android 4.3, please email me your device and firmware details. It would also be useful if you could send output from the env command run via a terminal app or using adb shell.

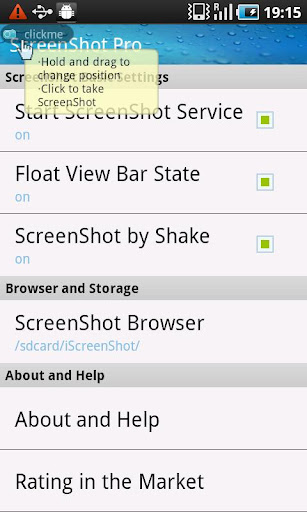
Screenshots (click to enlarge)

Video Review
Sixaxis Controller 0.6.6 APK Download Links:
Google Play Store

Download Multiupload
Download [Mirror 1] Zippyshare
Download [Mirror 3] Sendspace
Download [Mirror 4] mirrorcreator


- The games and apps on this site are meant for TESTING, FEEDBACK and PROMOTIONAL purposes only. If you like a game or app then please buy it from GOOGLE PLAY STORE and Support the Developers whose software you actually enjoy!


Android Apk
Read More..
Tata Sky
Direct-to-home television operator Tata Sky plans to invest Rs 900 crore this fiscal on upgrading technology as it targets a 30 per cent growth in subscribers.
"We will invest around Rs 900 crore to shift to new technology that will help us expand our channel offerings," Tata Sky CEO Harit Nagpal told PTI.
The company will switch to the MPEG-4 format from the current MPEG-2 standard, enabling it to offer more than 300 channels from about 230 now. The changeover is part of Tata Skys strategy to increase its subscriber base, which stands at 10 million.
"We have already started the process of moving over to the new technology. This is likely to be completed by July 2014. We have to change set-top boxes of each of our customers, hence it will take so long," Nagpal said.
Tata Sky is one of six private DTH companies offering services to 56.5 million subscribers as of March 31, according to the Telecom Regulatory Authority of India (TRAI).
"We will grow by 25-30 per cent this financial year," Nagpal said, adding that digitisation has helped to win over former analog cable customers.

DTH companies are adding 8-10 million customers every year as analog cable systems are digitised to allow all TV signals to be provided only through set-top boxes, he said.
The second phase of digitisation of cable TV systems ended on March 31 and covered 38 cities with a population of more than 1 million, according to TRAI. The whole country is expected to be covered by the end of 2014.


Android Apk
Read More..

Wednesday, March 30, 2016

Twitter v3.0.0
Twitter v3.0.0


Description
Official Twitter app for Android.

Follow your interests: instant updates from your friends, industry experts, favorite celebrities, and what’s happening around the world. Get short bursts of timely information on the official Twitter app.

Real-time search reveals breaking news, while trending topics show what’s happening now around the world. View trends, browse your interests and see suggested users in several categories, including fashion, entertainment and travel, or search to find out what people are saying about topics you care about, such as politics or big sporting events.

Features: Browse interests, Find & follow friends, Tweet, Retweet, Favorite, Follow, exchange Direct messages with your followers, share photos and web pages, real-time search, trends.

   https://sites.google.com/site/freeapkandroidapps3/Market_3.4.4.apk


Android Apk
Read More..
Samsung Galaxy Ace 3 with model number GT-S7270 has already received the Android 4.2.2 Jelly Bean update with firmware build number S7270XXUAMH1. The new official firmware is now available in select countries as an Over-The-Air (OTA) update as well as through Samsung KIES.

Firmware details
PDA: S7270XXUAMH1
CSC: S7270OJVAMH1
MODEM: S7270XXUAMF5
Version: Android 4.2.2
Build date: Aug 02, 2013
Regions: South Africa, Morocco, Afghanistan, United Arab Emirates, Saudi Arabia, Algeria

Samsung Galaxy Ace 3 S7270 users who missed the OTA update notification or unable to access the update over Samsung KIES, may follow our step-by-step guide to install the update manually.

Pre-requisites
1. Install USB Drivers for Samsung Galaxy Ace 3 on the computer.
2. Enable USB Debugging Mode on the phone by navigating to Settings >> Developer Options.
3. Make a backup of all your important data before following the guide.
4. The Galaxy Ace 3 should be factory unlocked and not locked to any particular carrier.
5. Ensure the battery of the phone is charged more than 80 percent.
6. The Android 4.2.2 XXUAMH1 Jelly Bean firmware is compatible only with the Samsung Galaxy Ace 3 (GT-S7270). Applying this to any incorrect variant might brick the device. Verify the model number of the Galaxy Ace 3 by navigating to Settings >> About Phone.

File Required
1. Android 4.2.2 XXUAMH1 Jelly Bean Firmware (Alternative Link) for Galaxy Ace 3 S7270
2. Odin 3.07

Steps to Update Galaxy Ace 3 S7270 with Android Android 4.2.2 XXUAMH1 Jelly Bean Firmware
Step 1: Extract Firmware zip file using winrar/7zip/winzip or any other extracting tool, you will get a .tar.md5 file and some other files.
Step 2: Extract Odin zip file and you will get Odin3 v3.07.exe along with few other files.
Step 3: Switch off the Galaxy Ace 3.
Step 4: Boot the device into Download Mode by pressing and holding Volume Down, Home and Power buttons together until a construction Android robot icon with a warning triangle appears on screen. Now press the Volume Up button to enter Download Mode.
Step 5: Run Odin on the computer as an Administrator.
Step 6: Connect the Galaxy Ace 3 to the computer using USB cable while it is in the Download Mode. Wait until Odin detects the device. When the device is connected successfully, the ID: COM box will turn to light blue with the COM port number. Additionally, the successful connected will be indicated by a message saying Added.

Note: If the Added message does not appear, then try re-install USB drivers or changing the port on the computer.

Step 7: Select the following files in Odin from extracted S7270XXUAMH1 firmware folder:
  • Click the PDA button and select the .tar.md5 file.
  • Click the Phone button and select file with MODEM in its name. Ignore if there is no such file.
  • Click the CSC button and select file with CSC in its name. Ignore if there is no such file.
  • Click the PIT button and select the .pit file. Ignore if there is no such file.
Step 8: In Odin, enable Auto Reboot and F. Reset Time checkboxes. Also, ensure the Re-Partition checkbox is chosen only if a .pit file was chosen in the previous step.
Step 9: Verify everything suggested in Step 7 and Step 8 is done correctly. Then hit the Start button to begin the installation process.
Step 10: Once the installation process is completed, your phone will restart and soon you will see a PASS message with green background in the left-most box at the very top of the Odin. You can now unplug the USB cable to disconnect your device from the computer.

Samsung Galaxy Ace 3 S7270 should be now updated with official Android 4.2.2 XXUAMH1 Jelly Bean. Head over to Settings >> About Phone to verify the software version running on the device.

Note: If Galaxy Ace 3 S7270 stuck at booting animation after Step 10 then go to recovery mode (press and hold the Volume Up, Home and Power buttons together) and perform Wipe data/Factory Reset and Wipe Cache Partition task before selecting reboot system now function. In recovery mode use Volume keys to navigate between options and Power key to select the option. Please note, performing wiping task will erase your device internal memory data and not external SD card data.


Android Apk
Read More..
If you’re into WordPress development, you can’t ignore hooks for long before you have to delve into them head on. Modifying WordPress core files is a big no-no, so whenever you want to change existing functionality or create new functionality, you will have to turn to hooks.
wp-hooks-guide
In this article, I would like to dispel some of the confusion around hooks, because not only are they the way to code in WordPress, but they also teach us a great design pattern for development in general. Explaining this in depth will take a bit of time, but bear with me: by the end, you’ll be able to jumble hooks around like a pro.

Why Hooks Exist

I think the most important step in grasping hooks is to understand the need for them. Let’s create a version of a WordPress function that already exists, and then evolve it a bit using the “hooks mindset.”
function get_excerpt($text, $length = 150) {
$excerpt = substr($text,$length)
return $excerpt;
}
This function takes two parameters: a string and the length at which we want to cut it. What happens if the user wants a 200-character excerpt instead of a 150-character one? They just modify the parameter when they use the function. No problem there.
If you use this function a lot, you will notice that the parameter for the text is usually the post’s content, and that you usually use 200 characters instead of the default 150. Wouldn’t it be nice if you could set up new defaults, so that you didn’t have to add the same parameters over and over again? Also, what happens if you want to add some more custom text to the end of the excerpt?
These are the kinds of problems that hooks solve. Let’s take a quick look at how.
function get_excerpt($text, $length = 150) {

$length = apply_filters("excerpt_length", $length);

$excerpt = substr($text,$length)
return $excerpt;
}
As you can see, the default excerpt length is still 150, but we’ve also applied some filters to it. A filter allows you to write a function that modifies the value of something — in this case, the excerpt’s length. The name (or tag) of this filter is excerpt_length, and if no functions are attached to it, then its value will remain 150. Let’s see how we can now use this to modify the default value.
function get_excerpt($text, $length = 150) {

$length = apply_filters("excerpt_length");

$excerpt = substr($text,$length)
return $excerpt;
}

function modify_excerpt_length() {
return 200;
}

add_filter("excerpt_length", "modify_excerpt_length");
First, we have defined a function that does nothing but return a number. At this point, nothing is using the function, so let’s tell WordPress that we want to hook this into theexcerpt_length filter.
We’ve successfully changed the default excerpt length in WordPress, without touching the original function and without even having to write a custom excerpt function. This will be extremely useful, because if you always want excerpts that are 200 characters long, just add this as a filter and then you won’t have to specify it every time.
Suppose you want to tack on some more text, like “Read on,” to the end of the excerpt. We could modify our original function to work with a hook and then tie a function to that hook, like so:
function get_excerpt($text, $length = 150) {

$length = apply_filters("excerpt_length");

$excerpt = substr($text,$length)
return apply_filters("excerpt_content", $excerpt);
}

function modify_excerpt_content($excerptAndroid Apk
Read More..
Looking for cool twitter hacks ? In this post I’ll show you top 4 twitter hacks : custom twitter backgrounds, how to do twit of more than 140 characters, how to know who has unfollowed you, automated twitter followers 

1. Custom Twitter Backgrounds

Good background themes really can add charms in your profile. In twitter, you can choose nineteen basic background themes as you have no option to choose rather than them but, it is possible to use and customize backgrounds according to yourchoice. In order to do it, you have to go to www.tweetstyle.com and there, select your desired theme and download it. Now, the next step is to upload it in your twitter account. In this way, you can set your own custom twitter background. You can also go-to Colourlovers.com and can create your own custom theme as all you need to sign in your twitter account in order to set it for twitter. So, in-order to select background theme for your twitter’s profile, you have to go to- Settings- Design Menu.


2. How to do twit of more than 140 characters

Twitter doesn’t allow posting texts more than 140 characters but, it is possible to post texts more that 140 characters by using web-site named- TwitLonger.com. Yes, Twit Longer is an easy way to post long messages to twitter as write what you need at Tweet Longer and Tweet Longer will post the link to twitter for you.


3. How to know who has unfollowed you

In order to know about who has un-followed you in your twitter’s account as for it; you have to go to www.twunfollow.com and there, sign in by your twitter account. Now, the next step is to enter your email-id and then, this service will tell you information about who has un-followed you.


4. Automated Twitter Followers

Yes, now you can get automated twitter’s followers with the help of Free-Followers.com. Free-Followers.com is a unique service that allows you to automatically grow and maintain your Twitter’s Follower base. In Free-Followers.com, you can do-
1. Automatically searches recent tweets and user profiles for people with similar interests.
2. Automatically Follows People with the same interests.
3. Automatically Un-Follows those Twitter users that don’t follow you back, this helps maintain a balance between followers and following.
So, free-followers.com is a great way in-order to increase your twitter followers and manage your twitter account.

Finally, these above twitter features are really interesting to do. I hope you like this page…


Android Apk
Read More..
Gps Speedometer Pro apk

Current Version : 1.1.1
Requires Android : 1.5 and up
Category : Tools
Size : 3.7M

Original Post From http://apktoolsdownload.blogspot.com


Gps Speedometer Pro apk Description

GPS SPEEDOMETER PRO

is a highly customizable,auto scalable speedometer with large analogue view,designed for daily use with perfect visual graphics.

a perfect companion whenever you need to know your speed information,direction and altitude, Gps Speedometer Pro can be used efficiently for driving,riding,hiking,cycling,walking,racing etc...

You can keep record of your track or route and create valid GPX files and share with your friends.


Features

No Ads
-Better Performance
-Less Battery Usage
-No Distraction

Graphics
-Customizable Graphics
-Speedometer Hand(3 selections)
-Speedometer Wheel(3 selections)

GPS
-Smart Gps lock
-Quick Gps locking

Scaling and Auto Scale(Speedometer Numbers)
-Auto scale
-Scale can be adjusted
- 0/80 Scale
- 0/160 Scale
- 0/260 Scale


Speed Information
-KMPH,MPH,KNOTS
-Average Speed
-Maximum Speed
-Average and Maxium Speed can be reset

Address Information
-Your actual location address
-Street name
-Post code

Creating Gpx Files
-Gpx files are created automatically and saved in your SDCARD
-You can easily share or delete any file.
-Can be disable/enabled.
-Attach Gpx file and Send Email

Speed Limiter Warning
-Vibration
-Sound Alarm
-Volume Control for sound alarm
-Speed Limiter can be adjusted by touch and rotation around center -wheel as seen in the screenshots.

Compass Information
-Direction
-Degree

Altitude Information
-METRES,FEET
-Altitude
-Altitude correction,It can be adjusted by user ,positive or negative altitude correction values can be added to current altitude value

Font Selection
-Digital Font
-Normal Font

Screen Rotation
-Auto Screen Orientation

APP 2SDcard Support

Device Support
-All screen types are supported
-Small screen
-Normal screen
-Large Screen
-Tablets

Tested Devices
-Htc Hero (Android 2.1)
-HTC HD Desire (Android 2.2)
-Samsung Galaxy S2 (Android 2.3.3)
-SAMSUNG GALAXY TAB (Android 2.2)


User Permissions,Privacy,Security
-Gps Speedometer does not store or collect any personal information
-Please note that requested permissions are required by Ads software used in the application.Gps Speedometer only uses and needs Gps usage permission.If you have any questions regarding permissions please contact our developers.Pro version requires less permissions as it is no ads application.

Quick Guide
Please make sure you are outside of your room or before you enable your gps,
First enable your Gps by pressing the red gps button on the top right.

Once the gps signal is picked or gps is locked, gps button will become blue color which indicates that gps signal is available, in cases when gps signal is lost,gps icon will turn to red,indicating that gps is trying to get lock.

Gpx Files are located at /sdcard/GpsSpeedometerProGpx/ folder.


IF YOU ARE HAVING ANY PROBLEM FOR ANY REASON OR YOU ARE NOT SURE HOW TO RUN THE APPLICATION PLEASE CONTACT OUR DEVELOPERS

linxmap@hotmail.co.uk

Enjoy the new version and have a safe ride...

Thanks
Linxmap Dev Team


Gps Speedometer Pro apk Videos and Images


Visit us on http://apktoolsdownload.blogspot.com

download


Android Apk
Read More..

Tuesday, March 29, 2016

ScreenShot Free apk
ScreenShot Free apk

Current Version : 2.4
Requires Android : 2.1 and up
Category : Tools
Size : 285k

Original Post From http://apktoolsdownload.blogspot.com


ScreenShot Free apk Description

ScreenShot Free is an Android app which is used to take screenshot of your Android phone.


*** Only those ROOTED phones are supported ***
You can take a screenshot by shake or click the bar.
Files can be saved as jpg format in the sdcard.
You can browse it to share or delete.


Features:
1.click bar to take a screenshot
2.shake to take a screenshot
3.Screenshot by notification
4.share your screenshot with your friends via email or facebook,twitter,Instagram,weibo,renren,msn,Flicker,Picasa and so on
4.browse all the screenshot you have captured or snaped on your phone.

You can search these keywords for our apps:
, screenshot , capture ,take photos , camera ,shake , status bar ,share to facebook twitter msn mail weibo renren, free, app2sd , screen shot , screen shot free , screen snap ,snap show , droid

Attention:
Only Rooted phone can use this app.


set permissioins:
- READ_PHONE_STATE
- ACCESS_NETWORK_STATE- INTERNET
- ACCESS_COARSE_LOCATION
- READ_LOGS
: For flurry admob and umeng feedback.- SYSTEM_ALERT_WINDOW: for topmost screenshot button.- WRITE_EXTERNAL_STORAGE: to save the screenshot.

If you don't have root.Please uninstall this app.
Don't say some bad things in the critical.Thank you.


ScreenShot Free apk Videos and Images


Visit us on http://apktoolsdownload.blogspot.com

download


Android Apk
Read More..

Monday, March 28, 2016

Today I’m going to show you how to easily recycle your blogposts and get them continuous traffic from social media.
And yes… you will leave this page as a lethal “Blog Recycling Ninja”.
Please use your new powers wisely. :)

The Problem

If you’re a blogger like me, you pour hours & hours into writing your blogposts.
You find the right keywords, write a great headline, craft an amazing description, choose the best images, etc. etc.
When you’re done with your post, you blast it out to your email list and social media followers — on Facebook, Twitter & Google+.
Then if you’re like me, after publishing & sharing your awesome post, you quickly move on to the next one — pretty much forgetting the last one.
Sure you might come back to the post when someone shares it or comments on it — or if it goes viral.
But for the most part you tend to forget your previous posts and move on to the next ones… kinda like a preacher moves on to his next latest & greatest sermon every Sunday.

There must be a better way!

Yes, there needs to be an easier way to recycle or re-post your old blogposts — so you can make sure they’re being continuously shared, circulated & distributed around social media.
Guess what?  I found the way. :)
Yep, to my surprise I figured out some time ago that I could use Post Planner for this.monkey
Josh and his gang of code crunching monkeys have poured a ton of time into this app and added some amazing features — feature I think some of you don’t even know exist.
In fact, I’m seeing many competitors & newcomers copying what Josh created over 2 years ago.
*** It should be noted that I started using the app as soon as it launched — and have been a customer ever since — long before I started working for Post Planner. So I say these things as a long time user & fan.
Anyway, let me show you how Post Planner makes it SUPER easy to recycle your older blogposts — and make sure they’re getting continuous circulation on Facebook.

How to Recycle your Old Blog Posts

Step 1: Install Post Planner!
The first thing you need to do is start (or continue) using the Post Planner app!
By the way, in case you missed it, Josh recently announced that the Pro app – formerly $4.95/mo. —  is now free for everyone!
Step 2: Find Your Blog’s RSS Feed
Now that you have Post Planner installed you need to get a copy of your blog’s RSS feed. 
Step 3: Go to Your Post Planner App 
Your app’s bookmark will be in the left column of your Facebook homepage (the News Feed). I’d highly recommend you add the app to your “Favorites” — so you can quickly access it whenever you need to.
I’ve gone a step further in my computer and added it as a bookmarklet in Chrome so I can click on it and go right to it — no matter where I am.
Step 4: Click “Content”
blog1
Step 5: Click “Add an RSS Feed URL”
blog2
Step 6: Add your RSS feed
Here’s where you simply paste in your blog’s RSS feed URL (which you got in Step 2).  Just paste the URL into the box — as seen below — and hit enter.
blog3
You will then see a new source in your library — with an RSS feed icon next to it, as seen below:
blog4
Now that you have your blog’s feed added to your Content library in Post Planner — well, this is where the good stuff begins!
Step 7: Click on your Blog Feed
When you click your blog feed, you’ll see a list of your blog’s recent posts populate in the left column — as shown here:
blog5
Step 8: Select an old Post & “Add to Publisher”
Now it’s time to find that post you wrote a few weeks ago and recycle it — just click it and then click “Add to Publisher”:
blog6
Step 9: Schedule the Post
Once you add your blogpost to the Publisher, you can (1) select the page, group or profile you want it to post it to, (2) add some text to the Status update box, (3) choose a date & time to publish, and (4) click “Post”.
blog7
Step 10: Lather, Rinse, Repeat
Now that you know how to quickly recycle your posts, it’s time to take a few minutes to schedule and re-schedule your posts to go out a week from now, 3 weeks from now, 5 months from now and even a year from now.
There is no limit to how far out in the future you can schedule it.  You can even use the repeating feature and have your posts automatically repeat every couple weeks.
* Let me stress that the repeat feature is super useful — and I’ve used it many times before. But remember that by using it, your followers may see the same text of your status update over & over — and it may look automated to them. So use the repeating feature with that in mind. Of course, you CAN go into Post Planner and edit the text of a repeating post whenever you want.  FYI.

Key Takeaway

key takeawaysThe key takeaway I want you to get here is that you shouldn’t just write a mind-blowing blogpost and then forget about it.
Instead, use Post Planner to quickly & easily re-post your article to your different pages — so the content doesn’t go dead.
Remember — just because you wrote a blogpost 4 weeks ago doesn’t mean everyone who follows you has read it!
The news feed on Facebook moves super fast these days — so it’s always wise to re-post your article a few times.
By scheduling out in advance exactly when you will be recycling the post — you not only get additional traffic from an older blogpost, but you also give high quality content to your followers in a non-annoying way.
You should also notice that on our Post Planner blog here, we don’t date our blog posts. There is a reason for this.
By not putting a date stamp on our posts we can recycle them any time we want and it doesn’t appear dated. Sometimes the human brain sees a date of 5 months ago and even-though the content is still relevant, we immediately ignore it because of the date.
I’d recommend doing the same on your blog — unless your blog only consists of date specific podcasts.
Was this helpful? I want to know. Let me know your thoughts and feedback in the comments.


Android Apk
Read More..

The LTE version of Samsung Galaxy Tab 3 8.0 with model number SM-T315 has officially received a new Android 4.2.2 Jelly Bean update with firmware build number T315XXUAMK1. The new official firmware is now available in France as an Over-The-Air (OTA) update as well as through Samsung KIES.

Firmware details
PDA: T315XXUAMK1
CSC: T315OXAAMK1
MODEM: T315XXUAMK1
Version: Android 4.2.2
Build date: Nov 12, 2013
Regions: France

Samsung Galaxy Tab 3 8.0 (LTE) SM-T315 users who missed the OTA update notification or unable to access the update over Samsung KIES, and those who are residing outside France can now download and install the same manually, using our step-by-step guide.

Pre-requisites
1. Install USB Drivers for Samsung Galaxy Tab 3 8.0 on the computer.
2. Enable USB Debugging Mode on the device by navigating to Settings >> Developer Options.
3. Make a backup of all your important data before following the guide.
4. The Galaxy Tab 3 8.0 should be factory unlocked and not locked to any particular carrier.
5. Ensure the battery of the device is charged more than 80 percent.
6. The Android 4.2.2 XXUAMK1 Jelly Bean firmware is compatible only with the LTE version of the Galaxy Tab 3 8.0 (SM-T315). Applying this to any incorrect variant might brick the device. Verify the model number of the Galaxy Tab 3 8.0 by navigating to Settings >> About Phone.

File Required
1. Android 4.2.2 XXUAMK1 Jelly Bean Firmware (Alternative Link) for Galaxy Tab 3 8.0 (LTE) SM-T315
2. Odin 3.07

Steps to Update Galaxy Tab 3 8.0 (LTE) SM-T315 with Android 4.2.2 XXUAMK1 Jelly Bean Firmware
Step 1: Extract Firmware zip file using winrar/7zip/winzip or any other extracting tool, you will get a .tar.md5 file and some other files.
Step 2: Extract Odin zip file and you will get Odin3 v3.07.exe along with few other files.
Step 3: Switch off Galaxy Tab 3 8.0.
Step 4: Boot the device into Download Mode by pressing and holding Volume Down, Home and Power buttons together until a construction Android robot icon with a warning triangle appears on screen. Now press the Volume Up button to enter Download Mode.
Step 5: Run Odin on the computer as an Administrator.
Step 6: Connect the Galaxy Tab 3 8.0 to the computer using USB cable while it is in the Download Mode. Wait until Odin detects the device. When the device is connected successfully, the ID: COM box will turn to light blue with the COM port number. Additionally, the successful connected will be indicated by a message saying Added.

Note: If the Added message does not appear, then try re-install USB drivers or changing the port on the computer.

Step 7: Select the following files in Odin from extracted T315XXUAMK1 firmware folder:
  • Click the PDA button and select the .tar.md5 file.
  • Click the Phone button and select file with MODEM in its name. Ignore if there is no such file.
  • Click the CSC button and select file with CSC in its name. Ignore if there is no such file.
  • Click the PIT button and select the .pit file. Ignore if there is no such file.
Step 8: In Odin, enable Auto Reboot and F. Reset Time checkboxes. Also, ensure the Re-Partition checkbox is chosen only if a .pit file was chosen in the previous step.
Step 9: Verify everything suggested in Step 7 and Step 8 is done correctly. Then hit the Start button to begin the installation process.
Step 10: Once the installation process is completed, your device will restart and soon you will see a PASS message with green background in the left-most box at the very top of the Odin. You can now unplug the USB cable to disconnect your device from the computer.

Samsung Galaxy Tab 3 8.0 (LTE) SM-T315 should be now updated with the Android 4.2.2 XXUAMK1 Jelly Bean official firmware. Head over to Settings >> About Phone to verify the software version running on the device.

Note: If Galaxy Tab 3 8.0 (LTE) SM-T315 stuck at booting animation after Step 10 then go to recovery mode (press and hold the Volume Up, Home and Power buttons together) and perform Wipe data/Factory Reset and Wipe Cache Partition task before selecting reboot system now function. In recovery mode use Volume keys to navigate between options and Power key to select the option. Please note, performing wiping task will erase your device internal memory data and not external SD card data.


Android Apk
Read More..